Lair Of The Multimedia Guru

2020-10-04

Checking dependencies from a Makefile

Why would one want to do that? Because its a very simple project that doesnt really need a full configure script.
This is from the FFV1 build which builds the related RFC (draft) documents.

The tools versions are checked before a target that uses them, the tests are done just once and not again until you run make clean. It will put a file ending in version-ok for each tool in the build directory to keep track of what has been checked. These are cleared on a make clean.

Heres the full Makefile with the version checks showing how we ended up doing it. So far it seems working on everyones machiene who wanted to work on the ffv1 docs. Note, none of the authors of this Makefile is a Makefile expert, it certainly can be improved. I am just posting this as it might be a useful inspiration/ starting point to others who dont want a full configure in a small project.

PS: if someone has suggestions for improvements, pull requests are welcome in ffmpeg/ffv1

VERSION := 17
STATUS := draft-
OUTPUT := $(STATUS)ietf-cellar-ffv1-$(VERSION)

VERSION-v4 := 14
STATUS-v4 := draft-
OUTPUT-v4 := $(STATUS-v4)ietf-cellar-ffv1-v4-$(VERSION-v4)

$(info RFC rendering has been tested with mmark version 2.2.8, xml2rfc 2.32.0, xmlstarlet 1.6.1, pandoc 1.19.2.1, pdfcrop v1.38, and pdf2svg 0.2.3, please ensure these are installed and recent enough.)

all: $(OUTPUT).html $(OUTPUT).txt $(OUTPUT).xml $(OUTPUT-v4).html $(OUTPUT-v4).txt $(OUTPUT-v4).xml

$(OUTPUT).md: ffv1.md 
        cat rfc_frontmatter.md "$<" rfc_backmatter.md | grep -v "^AART:" | grep -v "^SVGC" | grep -v "{V4}" | sed "s|^AART:||g;s|{V3}||g;s|SVGI:||g;s|@BUILD_DATE@|$(shell date +'%F')|" > $(OUTPUT).md

$(OUTPUT-v4).md: ffv1.md 
        cat rfc_frontmatter.md "$<" rfc_backmatter.md | grep -v "^AART:" | grep -v "^SVGC" | grep -v "{V3}" | sed "s|^AART:||g;s|{V4}||g;s|SVGI:||g;s|@BUILD_DATE@|$(shell date +'%F')|" > $(OUTPUT-v4).md

%.xml: %.md mmark.version-ok xmlstarlet.version-ok pdfcrop.version-ok
        bash makesvg
        mmark "$<" | sed 's||undated|g' > "$@"
        xmlstarlet edit --inplace --insert "/rfc" --type attr -name sortRefs -v "true" "$@"
        bash svg2src "$@"

%.html: %.xml xml2rfc.version-ok
        xml2rfc --html --v3 "$<" -o "$@"

%.txt: %.xml xml2rfc.version-ok
        xml2rfc --v3 "$<" -o "$@"

clean:
        rm -f ffv1.pdf ffv1-v4.pdf ffv1.html ffv1-v4.html draft-ietf-cellar-ffv1-* merged_* mmark.version-ok xml2rfc.version-ok xmlstarlet.version-ok pdfcrop.version-ok

mmark.version-ok:
        test ` mmark --version | sed 's/\.\([0-9][0-9]\)/\1/g;s/\./0/g' `0 -ge 202080 && touch mmark.version-ok || (echo mmark version 2.2.8 or later is required && exit 1)

xml2rfc.version-ok:
        test ` xml2rfc --version | sed 's/.* //g;s/\.\([0-9][0-9]\)/\1/g;s/\./0/g' `0 -ge 232000 && touch xml2rfc.version-ok || (echo xml2rfc version 2.32.0 or later is required && exit 1)

xmlstarlet.version-ok:
        test ` xmlstarlet --version | head -1 | sed 's/\.\([0-9][0-9]\)/\1/g;s/\./0/g' `0 -ge 106010 && touch xmlstarlet.version-ok || (echo xmlstarlet version 1.6.1 or later is required && exit 1)

pdfcrop.version-ok:
        test ` pdfcrop --version | sed 's/.* v//;s/\.\([0-9][0-9]\)/\1/g;s/\./0/g' `0 -ge 1380 && touch pdfcrop.version-ok || (echo pdfcrop version 1.38 or later is required && exit 1)
Filed under: FFmpeg — Michael @ 09:30

2020-01-12

Fate boxes 2020-01

FATE strikes back

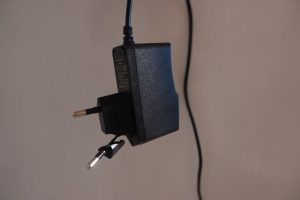
The Cubox no longer boots, the Panda boards power supply no longer works, it actually literally fell apparent when i unplugged it

The USB stick in my Panda board failed, huge amounts of bad sectors. Ive had it running with the power supply from the dead cubox and the sdcard as storage device.
That lead to out of disk space issues as fate is not just evil but its also big. So today the panda board has a new usb stick (SanDisk Extreme Go 64GB USB 3.1), which was the cheaptest brand name + fast one i found quickly.
Some benchmarks of the SD card vs the USB stick

sd card configure (-O1 gcc-4.4)
real 0m50.546s
user 0m24.523s
sys 0m11.164s

sd card build -j2
real 24m46.453s
user 38m38.586s
sys 3m14.938s

sd card fate -j2 -k
real 75m42.462s
user 104m30.688s
sys 8m33.727s

usb configure (-O1 gcc-4.4)
real 0m47.655s
user 0m24.719s
sys 0m11.297s

usb build -j2
real 21m25.833s
user 38m32.438s
sys 3m5.820s

usb fate -j2 -k
real 57m29.724s
user 103m6.180s
sys 7m30.867s

My i7-5820K box, which runs several fate client VMs also was showing signs of age, its main disk (Samsung SSD 850 PRO 512GB) showed an accelerating increase in number of reallocated sectors. That being after over 5 years of continuous 24/7 use by multiple FATE VMs, reading and writing. Ive a few days ago replaced it by a Samsung SSD 970 PRO 1TB. That also means theres spare space now for new fate clients if i find the time to setup something …

Filed under: FFmpeg,Hardware — Michael @ 11:12

2019-09-03

Main development machine failure

2 days ago before going to bed i started some tests on my box. When i woke up yesterday, i couldnt login remotely to the box, looking more careful the box was waiting for keyboard input during boot. It had issues previously and i intended to replace it for a long time. That was on hold because the ryzen 3950X isnt available yet which i wanted to use for a new box.
So i helped it boot, restarted the task and a bit later the box fans and disks spun down it rebooted again. My first thought was power supply or mainboard issue. The box after all was used alot and was somewhat old. I had a power supply laying around which was intended for my the future 3950X. So a little unhappy i moved the other machine that blocked access to the failing box away. Next with some dust mask and vacuum cleaner i removed many years of dust. Having removed all dust that failed to hold on. I wanted to check if it still booted, what temperature it reached and if maybe it worked now. The moment i switched it on i was glad i had the dust mask still on, for some reason more dust was blown out by the noctua fans. And it was interesting to see the dust coming out and some of it being sucked into my still running vacuum cleaner. The machine booted and i restarted the task, it didnt fail. So i tried again and then run fate in a loop. It reached 86°C cpu temp IIRC but it didnt fail or reboot again. Now a day later, the machine showed no further anomalies, it seems happy again.
This was the first time I ve had a system apparently failing from nothing but dust.

Filed under: FFmpeg,Hardware — Michael @ 21:50

2019-01-13

Another ARM failure

A few days ago when i wanted to run some benchmarks on my cubox, i run into some odd errors, investigation led to the micro sd card. There where several bad sectors that could not be read anymore.
Thats the first time ive myself seen a sandisk micro sd fail. ive seen transcend (really quickly) and kingston (not so quick) fails but no sandisk or samsung till now.
Another point for FATE, another disk it won against…
But how badly damaged is the sd card? ive run ddrescue on it for a few days:

# ddrescue -r 5 /dev/sdd backups/cubox-2019-01-07 backups/cubox-2019-01-07.log

GNU ddrescue 1.17
Press Ctrl-C to interrupt
Initial status (read from logfile)
rescued: 7947 MB, errsize: 493 kB, errors: 217
Current status
rescued: 7947 MB, errsize: 254 kB, current rate: 0 B/s
ipos: 7389 MB, errors: 48, average rate: 122 B/s
opos: 7389 MB, time since last successful read: 1.5 m
Finished
# ddrescue -r 20 /dev/sdd backups/cubox-2019-01-07 backups/cubox-2019-01-07.log

GNU ddrescue 1.17
Press Ctrl-C to interrupt
Initial status (read from logfile)
rescued: 7947 MB, errsize: 254 kB, errors: 48
Current status
rescued: 7948 MB, errsize: 193 kB, current rate: 0 B/s
ipos: 7389 MB, errors: 37, average rate: 10 B/s
opos: 7389 MB, time since last successful read: 7.2 m
Finished
# ddrescue -r 40 /dev/sdd backups/cubox-2019-01-07 backups/cubox-2019-01-07.log

GNU ddrescue 1.17
Press Ctrl-C to interrupt
Initial status (read from logfile)
rescued: 7948 MB, errsize: 193 kB, errors: 37
Current status
rescued: 7948 MB, errsize: 176 kB, current rate: 0 B/s
ipos: 7389 MB, errors: 36, average rate: 1 B/s
opos: 7389 MB, time since last successful read: 41.4 m
Finished
# ddrescue -r 80 /dev/sdd backups/cubox-2019-01-07 backups/cubox-2019-01-07.log

GNU ddrescue 1.17
Press Ctrl-C to interrupt
Initial status (read from logfile)
rescued: 7948 MB, errsize: 176 kB, errors: 36
Current status
rescued: 7948 MB, errsize: 172 kB, current rate: 0 B/s
ipos: 7389 MB, errors: 35, average rate: 0 B/s
opos: 7389 MB, time since last successful read: 4.7 h
Finished
# ddrescue -r 160 /dev/sdd backups/cubox-2019-01-07 backups/cubox-2019-01-07.log

GNU ddrescue 1.17
Press Ctrl-C to interrupt
Initial status (read from logfile)
rescued: 7948 MB, errsize: 172 kB, errors: 35
Current status
rescued: 7948 MB, errsize: 163 kB, current rate: 0 B/s
ipos: 7389 MB, errors: 33, average rate: 0 B/s
opos: 7389 MB, time since last successful read: 41.7 m
Finished
# time ddrescue -r 320 /dev/sdd backups/cubox-2019-01-07 backups/cubox-2019-01-07.log

GNU ddrescue 1.17
Press Ctrl-C to interrupt
Initial status (read from logfile)
rescued: 7948 MB, errsize: 163 kB, errors: 33
Current status
rescued: 7948 MB, errsize: 151 kB, current rate: 0 B/s
ipos: 7389 MB, errors: 30, average rate: 0 B/s
opos: 7389 MB, time since last successful read: 4.7 h
Finished

real 1119m16.116s
user 0m1.274s
sys 0m3.877s
# time ddrescue -r 640 /dev/sdd backups/cubox-2019-01-07 backups/cubox-2019-01-07.log

GNU ddrescue 1.17
Press Ctrl-C to interrupt
Initial status (read from logfile)
rescued: 7948 MB, errsize: 151 kB, errors: 30
Current status
rescued: 7948 MB, errsize: 147 kB, current rate: 0 B/s
ipos: 4393 MB, errors: 30, average rate: 0 B/s
opos: 4393 MB, time since last successful read: 15.1 h
Retrying bad sectors… Retry 375^C
Interrupted by user

real 1236m21.926s
user 0m1.383s
sys 0m4.204s

Its interesting to note that even after quite some time there are still damaged sectors which can be recovered. It was just myself loosing patience that made me stop it. Also i have a backup somewhere IIRC so this recovery was just out of curiosity. And maybe ill play more with this card in the future to see if theres anything that can be done to improve recovery.

Hopefully ill have the cubox with a new sd card up and running fate soon again … (should be quite trivial)

Filed under: FFmpeg,Hardware — Michael @ 01:21

2018-10-06

Pandaboard 5v power supply

A few days ago i noticed that my panda-board died. This is one of the 2 ARM systems on fate.ffmpeg.org.
Resetting or unplugging and re-plugging did not help. Replacing the power supply with a random 5v supply made it come back to life.
The failed power supply is a HNP-24-050 “HN Power Germany”. This is now probably the 3rd or 4th failed power supply for my panda board. The one its running on currently is a random one from ali-express. I must say iam really disappointed by the trash that some german electronic shops sell. All the failed power supplies where bought from germany, not china. The failed supply still produces 5v but when subjected to the slightest load its output collapses to 0, even 200mA is too much.
Ive read on the net that some digikey supply is recommended but both part numbers i found are marked obsolete.
Anyone has any recommendations ? I am not too positive that the 2€ +free shipping supply its running on currently will last very long.
I know i can just run it off a brand name ATX supply or a bench supply but that is a bit inconvenient.
Also if anyone wants to add more ARM hardware to fate.ffmpeg.org, so we have a bit more redundancy, thats certainly welcome

Filed under: FFmpeg,Hardware — Michael @ 23:41

2016-12-02

Printing on metal and glass

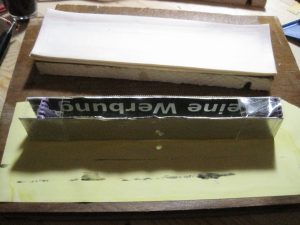
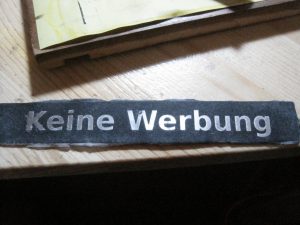
A while ago i had the “need” to make a non removable “no advertisements” “sticker. To do that i tried several different methods to print on and etch metal. The methods where roughly based on various youtube videos for making other things. Its a while ago so i hope i dont misremember the details, i should have written this immedeately…
All the methods start out with a laser printer and then transfer the toner onto the object as a mask for etching.

Cold toner transfer

The image to be transferred is printed on normal paper. the object its intended to be transferred to is placed flat on a table and is wetted with a mix of ethanol and acetone something like 8:5 vol. Pure ethanol will do nothing, pure acetone will smear the toner. Then the printout is placed on top avoiding air bubbles and some timespan like 20sec is waited for the toner to soften. Next the printout is firmly pressed by some means (i used 2 pieces of wood and clamps) for some time (i waited 3 min). next the pressure is removed and one waits for it to fully dry. Next it is soaked in water for some time (3min in my case) and then with luck one can peel the paper off while the toner still sticks to the object one wants to transfer it too. Depending on the toner and paper different procedures are likely optimal. Using this to place a mask onto a piece of scrap aluminum worked so-so, some parts of the toner didnt like sticking on my first attempts. Also this method is only suitable for creating a mask for further processing, you would not want to use this to print onto metal as a final step as there is still paper sticking to the toner.

img_4807-small

Hot toner transfer

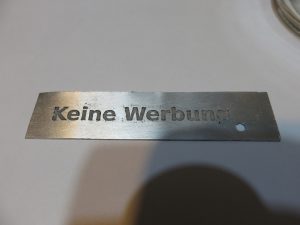
The image to be transferred is printed on “toner transfer paper” (from ebay). The object to be printed upon is heated to slightly above the melting point of the toner (likely around 100°C) (i used a kitchen hot plate). Its important to get the temperature approximately right, too hot and the paper will be burnt. Also IR thermometers do not work accurately on shiny metal surfaces. The paper is then placed on the hot object and pressed firmly onto it (i used a silicon tube with a glass rod in it rolling over the paper several times). Next the object is taken off the hot plate and let cool. When cool the paper is removed, the toner mostly sticks fine, some individual tiny holes may be present in the transferred toner. To ensure good adhesion i reheated the object to >50°C above the melting point of the toner.

Heres an example of the result of this method using the last piece of scrap aluminum i had laying around:
img_0714-small

Printing multiple times (if you can get the alignment right) or otherwise increasing the toner density improves the results of both methods. Also if there are defects, tiny holes or other you want to paint over them with something before etching. You also can apply some surface treatment like sanding or brushing to the metal before the toner transfer …

Etching

For the aluminum scrap pieces i had i used simple water and table salt as electrolyte, both anode and kathode where aluminum, separated by Plastic clothespins and held together by sticky tape. After several tries i learned that lower currents and voltages seem to work better. that is for the small piece i had something like 1.8V and i think 100mA for 2 hours. (Note, if you attempt to repeat this, you do so at your own risk, Electrolysis of water and table salt produces different things depending on the condition and electrode materials. Other electrolytes may be a better choice even though NaCl seems safe in this setup.)
After etching the toner mask needs to be cleaned off (unless it fell off already which it sometimes did and sometimes it stuck really
well) it can be removed with acetone or with patience also with other random things.

The electrodes with the cut up pieces of a clothespin and tape:
img_4806-small

The results of several attempts
img_0732-smallimg_0666-small

Transfer without etching

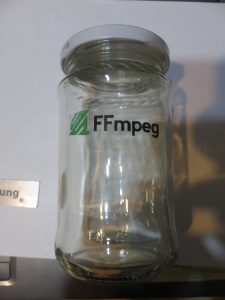
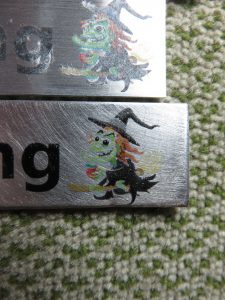
One can of course also skip the etching and keep the “mask” as the final result even with color or even as a addition to a previous etching step. This also works on glass (if you can heat and cool it without it shattering)

The results from my attempts for this:
img_0735-smallimg_0673_small

After this i had no scrap pieces of aluminum left nor really time and the problem i was trying to solve (someone repeatly removing my fathers no advertisement sticker from his mailbox … to collect more free coupons or paper … solved itself as she stopped)

Filed under: FFmpeg,Off Topic — Michael @ 14:37

2015-06-07

Loongson 3A heat and noise

The Loongson 3A box i have is loud, which was a bit of a surprise to me. Subjectively the noise from its CPU fan is significantly louder than my 2 overclocked 6core i7 boxes together though nowhere near the hurricane level of the powermac.
Originally i had planned to run the box 24/7 or similar and submit results to fate.ffmpeg.org. But for a box standing in my living room the noise level was too high for that.
Obvious solution rip the fan out and stick a less noisy one in,
IMG_9336B
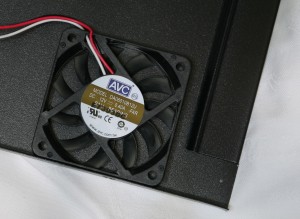
its a standard 60x60x15.5mm fan, i choose the Noctua NF-A6x25 FLX as replacement, i didnt pick the PWM variant because for some reason the 4pin cpu fan connector was unused and the old fan used a 3pin sys fan connector, so it felt safer to me to use the same.
To remove the old fan t he board must be removed, as the screws cant be undone without holding their behind.
IMG_9338B
With the screws and the fan, the heatsink comes off too:
IMG_9339B
The old thermal compound seemed not entirely uniform, part of it looked more solid than the rest. I intended to apply new anyway so that doesnt matter though, with the stuff cleaned off it looked this way:
IMG_9340B
As the noctua fan is thicker the screws cant be put all the way through the fan as they would be too short, putting them only through the bottom part makes them stick out at the bottom of the main board a bit more but there is enough space, ive also slightly bent the outtermost heatsink fins a tiny bit inward so they rest on the rubber part of the fan and added some o rings around the screws for a bit of extra vibration decoupling which was probably useless.
Thats how the result lookes:
IMG_9342B
and theres the old fan:
IMG_9343B

Does it still work ? yes and it still passes fate
What about heat? before /proc/cputemp was between 40 and 42°C and now its between 38 and 41 °C both while running fate.
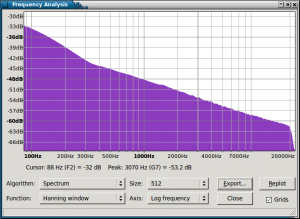
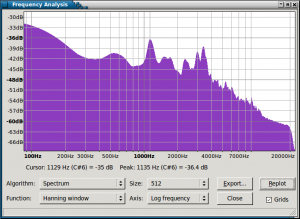
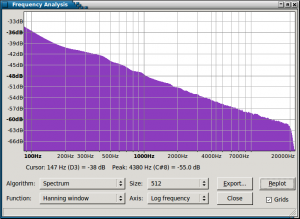
For noise testing i put a microphone 3cm in front of the closed box (thats far away from all fans). I was too lazy to switch my other boxes off though:

sys-off-spectrum old-spectrum

new-spectrum

Loongson Box switched off Original (AVC) fan New (Noctua) fan
Filed under: FFmpeg,Hardware — Michael @ 03:30

2015-05-22

FFmpeg FATE tests on Loongson

After the patches from loongson yesterday, FFmpegs full fate testset passed.

time make fate -j4 -k >& fatelist8
real 28m32.631s
user 98m50.422s
sys 12m53.547s

Filed under: FFmpeg,Hardware — Michael @ 17:16

2015-05-08

Loongson MIPS Box

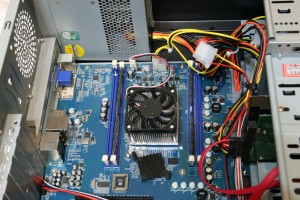
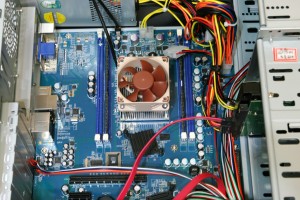
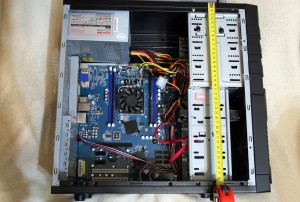
Loongson very generously donated a MIPS box with “ICT Loongson-3A V0.5 FPU V0.1” CPU, 500gb 7200rpm WD Caviar Blue HDD, 4gb RAM and a power cable with Chinese plug to FFmpeg. Picture of the inside of the box:
IMG_9334D
Quick power meassurments show

  • ~1W when OFF
  • ~44W when IDLE
  • ~48W when running fate tests

Quick FFmpeg build benchmark with gcc (GCC) 4.8.3 20140624 (Red Hat 4.8.3-1):

  • 4m49.192s for time ./configure --enable-gpl --enable-pthreads --samples=/home/loongson/fate/ --enable-nonfree --enable-version3 --assert-level=2 --cpu=loongson3a --enable-loongson3
  • 19m31.114s for make -j4
Filed under: FFmpeg,Hardware — Michael @ 04:00

2014-09-20

my FATE clients

Most of the x86 fate clients i did run, where run as VMs on a aging 2 core Westmere/Clarkdale i5 @ 3.33ghz. As ive added more and more virtual machines and configurations and the list of tests done by fate increased over the last 3 years, the box started to show its age, over these 3 years 1 HDD nearly failed, 1 SSD failed in it and as the amount of tests run kept increasing the time between tests being repeated kept getting longer.
About a week ago i ordered a new box to replace it finally. To my surprise the shop (in germany) refused to ship the HDD&SSD to austria, after a few minutes research on the matter i learned that apparently austromechana threatens german shops who dont pay them a fee on storage media thats sold to someone in austria. I guess one could also say European union & free trade at its finest.

But back to the topic, most of my x86 fate clients now run on a shiny new 6 core haswell @4.3ghz + samsung SSD. So the affected clients should be alot faster now and there are also already more tests being run, ive changed many of my clients to test the 3 currently maintained release branches in addition to git master.
Also, if you have some platform that supports FFmpeg and isnt on fate.ffmpeg.org, and you want to help FFmpeg, please setup a fate client (See the fate documentation).

Filed under: FFmpeg,Hardware — Michael @ 03:33
Next Page »

Powered by WordPress