Lair Of The Multimedia Guru

2012-02-22

Fixing a 24mm f/2 vivitar/kiron lens

A few years ago i bought a 24mm f/2 vivitar lens for something like 15 euros, the price was too good to not buy it. It was laying around pretty much untouched until a few days ago

It has a Canon FD mount, which means it is compatible with all Canon FD cameras. Sadly iam not a big fan of these cameras, I like conveniently working manual mode and digital. Adapters for FD->EOS exist but they require optical elements to compensate the otherwise negative adapter thickness that would be needed. So a more geeky solution is needed. But first problem with it is, its aperture is stuck and full of oil

Now cleaning an aperture is not hard, though do NOT try it with this lens if its your first such repair attempt, as this lens is a floating element design, which in laymen terms means complex. The tools you need are just a bunch of small screwdrivers (for most screws the cheapest will do), some paper towels for various things, a clean soft brush to remove dust. And something to clean the aperture blades, probably anything that removes oil would do. And a box of some kind to put all parts in when taking them apart so tiny things are trapped by gravity inside a quickly search-able space and not your whole room. First step is to loosen the screw on the side of the front

After that the top can be unscrewed, the next part is hold in place by a similar screw, loosen it too and unscrew the part, be careful as this exposes the front glass element and if you take it out, only thing you will achieve is getting dust in.

Now you need to remove the 2 screws and the part that holds the front lens group in correct distance/rotational alignment, you do want to take some notes or add markings to get it later back in exactly the same position. As i am lazy i relied on my carefully composed pic above instead of wimpy notes or markings. You also need a good screw driver here as these screws arent easy to loosen even after removing the stuff that holds them in place with aceton. After you removed the 2 screws and that thingy, put the ring that held the front element in place back so the element doesnt escape

Once the glass is secured you unscrew the front group as a whole (you have to turn it in the other direction from what you expect). After unscrewing it you reach the front side of the aperture. And here i believed i could just remove the 3 screws and take it out, but no its not nearly so easy.

So as we cant get it out yet, disassembling of the bottom is next, remove the 3 screws that hold the mount in place, beware there is a spring, a small pin and a metal ring that are more or less loose

The rear lens group is just screwed in and can easily be screwed out, allowing us access to the rear part of the aperture, what the annoying part is we still cannot take it out for proper cleaning.

To move forward next step is to remove the 2 screws and the part that hold the inner rear part in distance and rotational alignment, again take notes and make markings, the rear part is a little fiddly to put back together with markings (aka expect 2-3 minutes for doing that later) without markings, it would probably be fun but not impossible.

Now the inner rear can be screwed out. And hidden you will find 3 holes in the helix, in these holes there are screws that hold the aperture in place, to loosen them take careful note of their original position, or just be lazy and do like I and do exactly 3 full turns, so you can get it back with 3 exact full turns later. It shouldnt ruin the lens if the aperture isnt centered exactly but id guess there was a reason for this odd way to mount it

Once the 3 screws are loosened a bit (and a spring is removed) the aperture can be taken out, its further disassembly and reassembly should be obvious. To clean it you can probably use almost anything, i used a little window cleaner in a small container put all parts in and used the “shaken but not stirred” technique, in addition cotton buds and 100% ethanol. Note the pictures below dont look so oily because I tried cleaning it before full disassembly with cotton buds

Once cleaned, reassemble everything, its trivial just reverse of disassembly

From FD to M42 to EOS

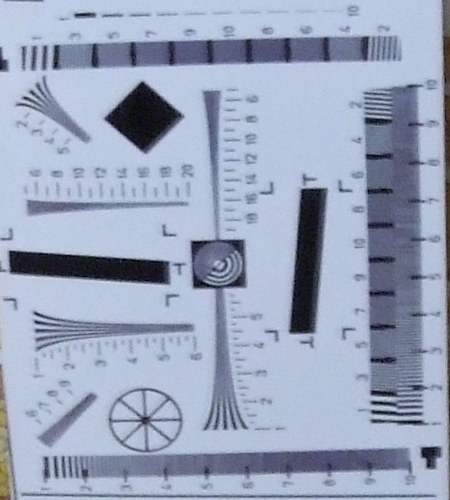
The rear FD mount was kept in place by 3 screws, looking a bit around i found a worthless 35mm/2.8 M42 lens laying around that only produces blurry images no matter what, though it was in 100% perfect condition, surely used only once by any previous owner. Its rear fits almost, 2 out of 3 screws can be screwed in without modification. For all 3 a little drilling is needed

With this hack it can be mounted on any M42 camera or with M42-EOS adapter on any canon EOS DSLR. it doesnt focus beyond 1m in that configuration though. That is at 1m real distance you are at infinite on the scale. Also its easy to switch the mounts back :)

Now to get it focus to infinity we need to loose some material, first the M42 rear i picked had a circular ridge that screamed to me “flatten me”

The pic above shows it in the middle of the flattening process. This wasnt enough though, infinity focus still was far away, so the ring that keeps the aperture selection ring in place had to go too. Note, below the next (now loose) ring are 2 loose springs and 2 tiny steel balls dont loose them if you try this. A magnet is a pretty nice way to temporary store them safely.

With this ring too removed infinite focus becomes possible on M42 and EOS. But due to all the removals, one ring holding the aperture selection ring in place and the aperture controlling parts that where part of the FD mount. We still arent done, so next is rebuilding the aperture control parts that a manual lens would have. Ive build it out of a piece of aluminum that i found in a old box from my grandfather, I still remember how my mother wanted to throw all the stuff from him away, lucky i safed a few boxes…

Above picture shows it in partly finished state, it needed more filing and bending before it worked fully smoothly. The removed ring also needs to be replaced. One could have just made it thinner but i dont have the tools to do this exactly and quickly, besides it would make it impossibly to undo it. So i used a piece of plastic cut from a cap of something random from the bathroom, also to get the focus a bit closer to correct (it was way over infinity) i put the thin metal ring from the FD mount back in

And last fine-tuned the focus with the 3 screws intended for that purpose visible at an earlier picture, cleaned the glass a bit and ready is my 24mm f/2 vivitar/kiron for M42 and EOS.

Was the work worth it? For the lens/photography, probably not. For the fun and geek factor, absolutely yes. :)

Filed under: Cameras,Hardware,Reverse Engineering — Michael @ 08:54

2007-11-05

Digicam, the story continues

Well after lots of looking around, reading reviews and all that, i finally realized that all compact cameras which are available currently suck. So my choices where down to getting an old analog camera or a DSLR, now “analog” film is just too inconvenient for my lazy self so i choose a DSLR, more precissely the EOS 400D, thats also what mans recommanded though mans recommandition was not really why i choose it. The EOS 400D is certainly not perfect but there arent many options, many cameras are just too expensive for my taste and then there are: sony alpha (crappy noisy sensor) pentax (non functional IS and IS is the only advantage over cannon), olympus (too small sensor), nikon (lens compatibility with their cheap DSLRs is no good and no real advantage over canon)

So is the EOS400D good? Well its not bad, it could be smaller and lighter, its viewfinder could be bigger and brighter, at least ive no problem using the viewfinder with glasses but manual focus at large apertures is not possible with it because the viewfinder limits the view to f/4 or so . I wonder if one of these 3rd party focusing screen replacements would help here?

The EOS400D also sadly doesnt have live view, that is viewing what you shoot on the LCD, but there arent many DSLRs which do, the 40D being one but its too large, heavy and expensive for this small extra feature, and note the only reason why i care about live view would be better manual focus ability

Lenses, well, getting a good lens for my DSLR turned out so far to be quite a bit more tricky than i thought. First lenses are expensive, it seems they are all sold at 10 times their production cost. Second you cant just read reviews and buy a lens based on that, the lenses provided to reviewers seem handpicked and perfectly adjusted by the manufactors, what you buy in a shop is not. But i didnt know that or rather i underestimated the sample variation some people claimed exists with lenses so i bought a 18-250mm f/3.5-6.3 Tamron lens, according to reviews and images there (as well as other reviews) this lens has better image quality than for example canons 17-85 IS USM and it of course has a much larger focalength range though its not that good at the larger focal lengths but then having all that range in a single lens seemed quite convenient. Well to make a long story short the 18-250 lens i got was so bad it went back where it came from at the first oppertunity. At 100mm one side was so much more blurry than the other it was immedeately vissible at 1024×786, there was no need to zoom in and look at pixels 1:1

Luckily i also bought a 50mm f/1.8 lens from canon, one of canons cheapest lenses but still vastly outperforming the 6 times as expensive crap 18-250 tamron i received, so the sample images below are all shot with that 50mm lens. Also note that i had to recompress the images to lower quality as wordpress refused the files due to their filesize

img_0501-320x240.jpg
For a long time that flower was on my balcony, now its in my grandmothers garden, and it doesnt seem to do that well as you can see :(

img_0505-320x240.jpg
Strange tiny tree, we bought a while ago, its needles are completely soft instead of sharp and it doesnt seem to grow

img_0506-320x240.jpg
Some random weed i think

img_0510-320x240.jpg
One of my grandmothers unique plants, this one is quite representative for many of them though not all, some are breathtakingly beautifull like her roses …
My mother said its a oleander, my grandmother disagreed, i dont remember if she said what it is

img_0514-320x240.jpg
Birds, overexposed IMO, it was very dark and rainy, also they dont look good at f/1.8 aperture

img_0515-320x240.jpg
second try at f/4, sadly most birds where gone already, also the image looks worse then the origial before the recompression needed to make wordpress happy filesize wise

img_0524-320x240.jpg
My mother wanted to take a (few) picture(s) as well, well, she tried, and tried but it didnt work, half pressing the shutter button, waiting for the autofocus and then full pressing it apparently isnt that easy, so the above image was taken by my mother with manual focus. What i learned out of that, well the EOS400D shutter button is very well build as it still worked after my mother was finished.

img_0532-320x240.jpg
After you fight your way through thickets you find in a corner of the garden some firewood perfectly protected from rain to dry, currently my grandmothers only means to heat her house as her more modern heaters broke down (not counting electricity based ones). Somehow i suspect the firewood will still be there in the spring and the heaters will still be broken and the electricity bill will be near 0. In normal houses you need to wear warm closes when you leave in my grandmothers house you need warm clothes when you enter.

img_0547-320x240.jpg

img_0557-320x240.jpg
Tasty looking apples (emphasis here is on looking)

img_0565-320x240.jpg
My mother identified it as parasol mushroom and said its edible, my grandmother said its poissionous (thats what my grandmother says about all mushrooms), i tried to convice them to try it ;)
btw, iam a little curious what it is, i am almost certain its not a parasol

img_0567-320x240.jpg
White roses (in the rain like everything else on that day)

Filed under: Cameras,Pictures — Michael @ 01:02

2007-10-06

F50fd part2

The image stabilization, well ive done more testing, 10 images without IS, 10 at continous mode, 10 at shot only mode, all at the wide angle side at 1/4 sec 12mp, quick summary the IS does not help, find the 2 best looking croped images for each of the 3 cases in the table below:

IS:off
IS:continous
IS:shot only

Random low iso images


and in case anyone is wondering how i reached a image number of above 6000 in a few days testing, well thats what happens if you switch sd cards around randomly one thing i learned from that though was the FD50fd had no problems displaying images made with the IXUS though it did not play my naively made mjpeg in AVI :( it did not even play its own video after it was remuxed but i didnt investigate this any further …

Filed under: Cameras,Pictures — Michael @ 22:32

Fujifilm F50fd vs. Canon digital ixus 30

I wanted a small compact digicam which is better at taking pictures in bad light than my ixus30, has full manual controls, a wider angle lens, … well no such camera exists currently. So i decided to try the F50fd, it has aperture and shutter priority modes, can take images at up to ISO 6400 and has a image stabilizer.

Size and weight: Well its a bit bigger and heavier than my ixus30 but it still is small enough to fit in my pocket

The image stabilizer: Well, what can i say, i took many images at the telezoom side at 1/5sec shutter with it in continous mode, with it in shot only mode and with it disabled, no single image was useable. Repeating the test at the wide angle side of the zoom at 1/5sec some images where ok others where not, the stabilizer again didnt make much of a difference, sadly ive lost patience and didnt take more than about 5 images each with stabi in mode 1 in mode 2 and without stabi so i dont have statistically significant data for that part. What i can say though is that the stabi did not help me take a single useable image at a shutter speed at which i wouldnt be able to take a good one with a few tries without the stabi

The manual control: Well it does work, and even quite well, you can change the aperture with a single button press, the exposure correcton as well can be changed with a single button press (after you switched the buttons into the right mode which needs 1 button press). Very sadly to change the ISO you have to press at least 3 buttons (4 after the camera is turned on). On the ixus30 you need 1 button press to cange ISO and exposure correction if you are in the correct menu (yes you can take images without leaving the menu on the ixus this doesnt work with the f50 ISO menu), you need 2 button presses to change between the ISO and exposure menues and 2 to reach the exposure and 4 for the ISO menu after power on on the ixus, so in summary the manual control could be made available more directly on both cameras.

Arbitrary limitations: There where a few surprises for me as i was playing around with the camera, first the aperture priority mode is limited to a shutter of 1/4sec at the long side, the shutter priority mode though can be used with up to 1sec. Longer exposures (up to 8 sec) are possible but only at ISO 100

Deleting images: I was mildly annoyed that i had to press 3 buttons to delete an image, but what was much more annoying was that the deletion comes with a nice animaton which you cant disable and which you have to let finish before you can do anything else. That is, its not hard to press the 3 button sequence a few times while the animation plays sadly it has no effect

Auto focus: This one does work better than on the ixus in low light with the focus assist lamp disabled

High ISO image quality: Well i hoped that the F50 would be a lot better at taking images at high ISO, sadly the difference is not that large, but see yourself:
F50 ISO3200 1/4sec f/2.8 Now how does one compare this to the IXUS30 which just has ISO400 well one (mis)uses the exposure correction to get the exposure one wants and then fixes the brightness/contrast in software
IXUS30 ISO400 -2EV 1/5sec f/2.8 (way too dark yes)
after -vf ow=7:8:16 and gimp to fix levels So which looks better? teh F50 one of course, lets compare it to a longer exposure of the IXUS
ISO400 -1EV 1/2sec f/2.8
fixed up levels in gimp
and with -vf ow=7:8:16 With the 2x longer exposure i would say the IXUS is at least as good as the F50 (with the shorter exposure). And there would be thumbnail images if wordpress would generate them or i knew how to upload several images at once instead of each one individually …

ISO values: well the more i played with the F50 the more i noticed that its ISO values dont match the IXUS ones, that is the IXUS30 at ISO400 seems to match approximately ISO600 on the F50 (matching here means same shutter, aperture and equally bright final images)

Colors: well the F50 is about as (in)accurate as the IXUS30 though they are different

Will i keep the F50? Probably not the improvement is too small over the IXUS30 also i dont like the heavy noise reduction the camera does, it becomes noticeable already at ISO400, the IXUS30 doesnt do this though more recent IXUS versions seem to also follow the trend of butchering images with noise reduction

Ill upload more pictures tommorow …

Filed under: Cameras,Pictures — Michael @ 03:44

Powered by WordPress