Lair Of The Multimedia Guru

2016-12-02

Printing on metal and glass

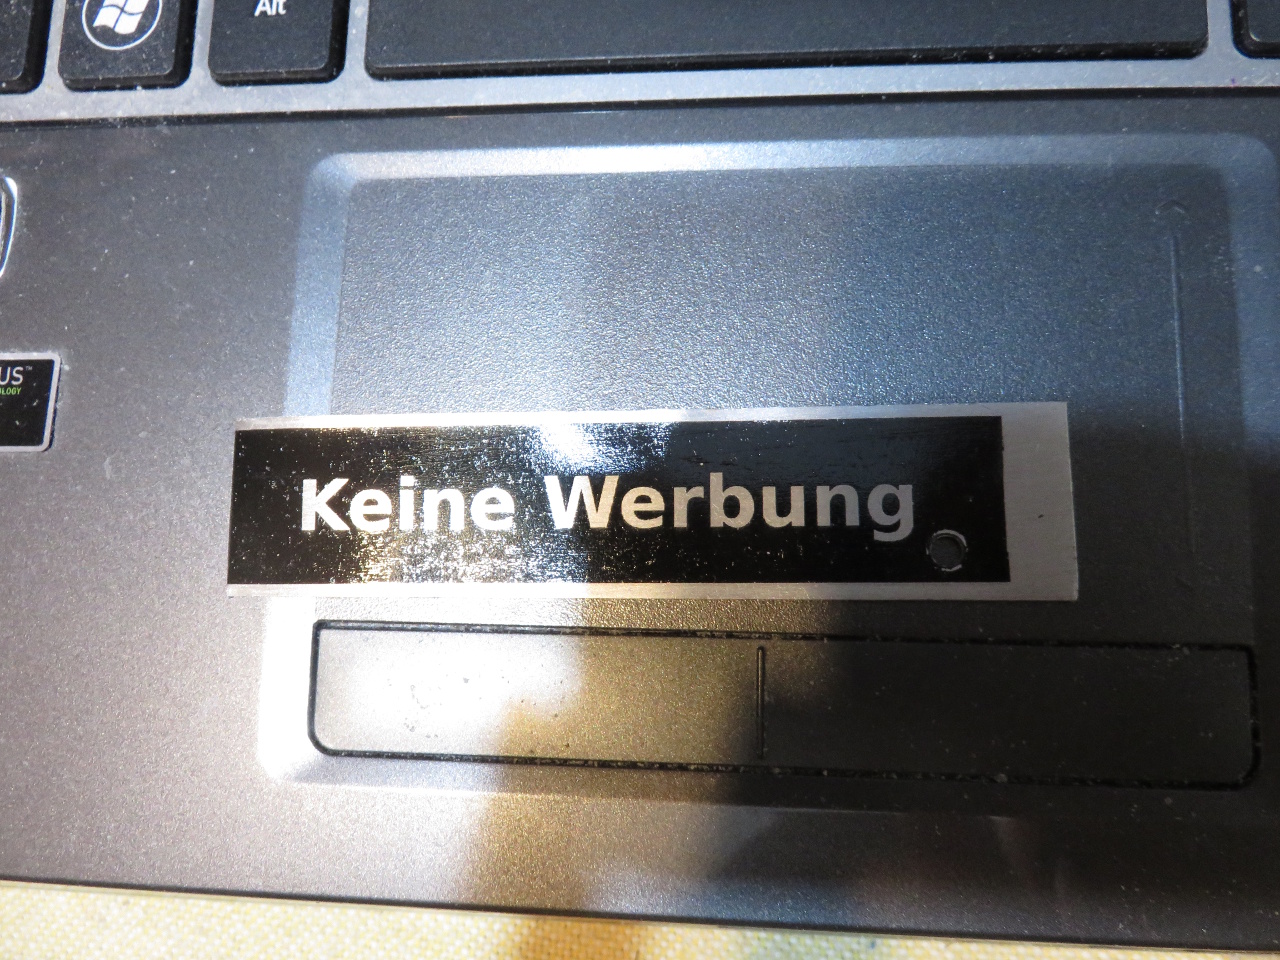
A while ago i had the “need” to make a non removable “no advertisements” “sticker. To do that i tried several different methods to print on and etch metal. The methods where roughly based on various youtube videos for making other things. Its a while ago so i hope i dont misremember the details, i should have written this immedeately…
All the methods start out with a laser printer and then transfer the toner onto the object as a mask for etching.

Cold toner transfer

The image to be transferred is printed on normal paper. the object its intended to be transferred to is placed flat on a table and is wetted with a mix of ethanol and acetone something like 8:5 vol. Pure ethanol will do nothing, pure acetone will smear the toner. Then the printout is placed on top avoiding air bubbles and some timespan like 20sec is waited for the toner to soften. Next the printout is firmly pressed by some means (i used 2 pieces of wood and clamps) for some time (i waited 3 min). next the pressure is removed and one waits for it to fully dry. Next it is soaked in water for some time (3min in my case) and then with luck one can peel the paper off while the toner still sticks to the object one wants to transfer it too. Depending on the toner and paper different procedures are likely optimal. Using this to place a mask onto a piece of scrap aluminum worked so-so, some parts of the toner didnt like sticking on my first attempts. Also this method is only suitable for creating a mask for further processing, you would not want to use this to print onto metal as a final step as there is still paper sticking to the toner.
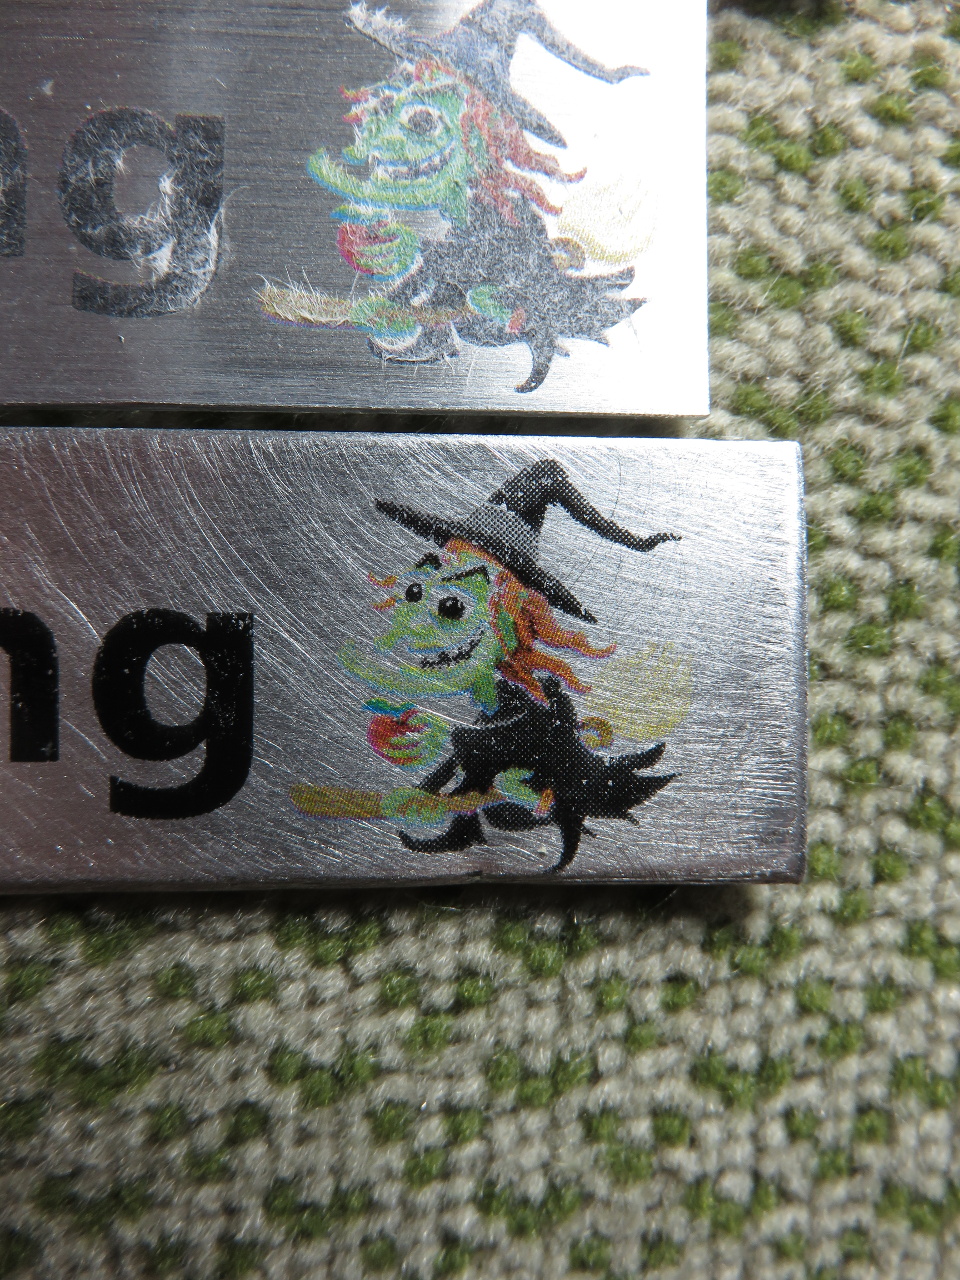
img_4807-small

Hot toner transfer

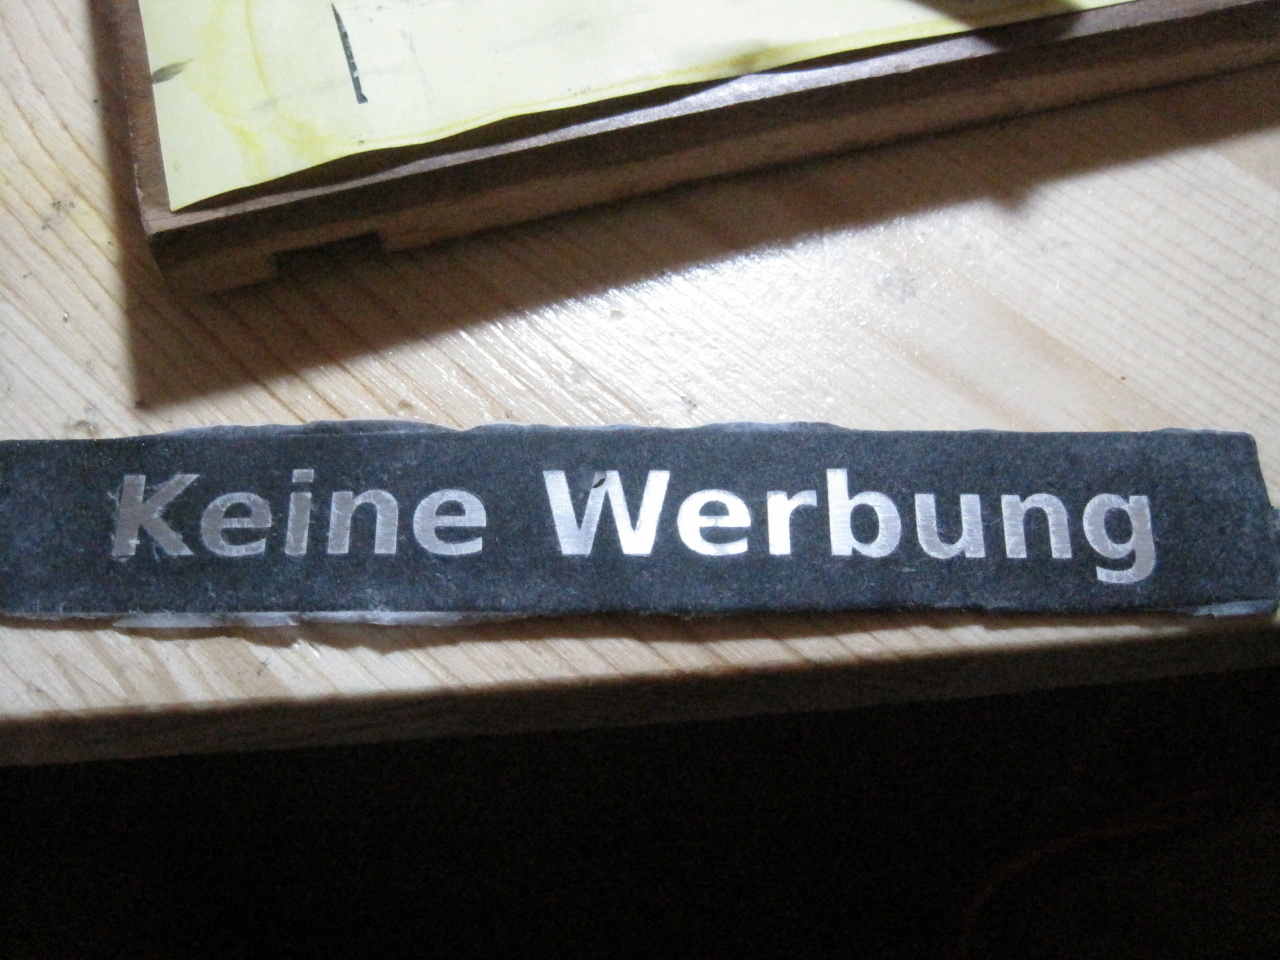
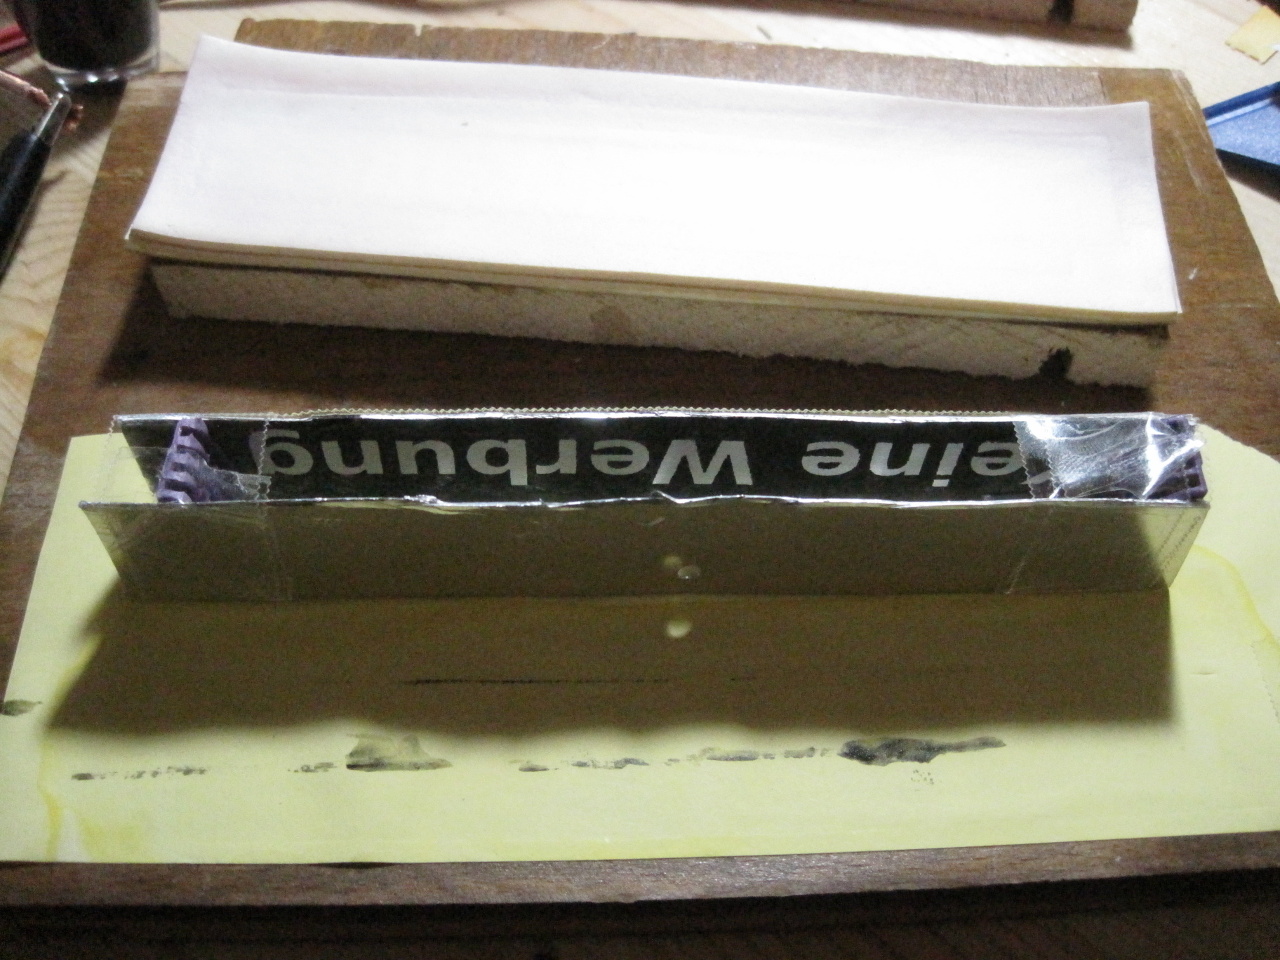
The image to be transferred is printed on “toner transfer paper” (from ebay). The object to be printed upon is heated to slightly above the melting point of the toner (likely around 100°C) (i used a kitchen hot plate). Its important to get the temperature approximately right, too hot and the paper will be burnt. Also IR thermometers do not work accurately on shiny metal surfaces. The paper is then placed on the hot object and pressed firmly onto it (i used a silicon tube with a glass rod in it rolling over the paper several times). Next the object is taken off the hot plate and let cool. When cool the paper is removed, the toner mostly sticks fine, some individual tiny holes may be present in the transferred toner. To ensure good adhesion i reheated the object to >50°C above the melting point of the toner.

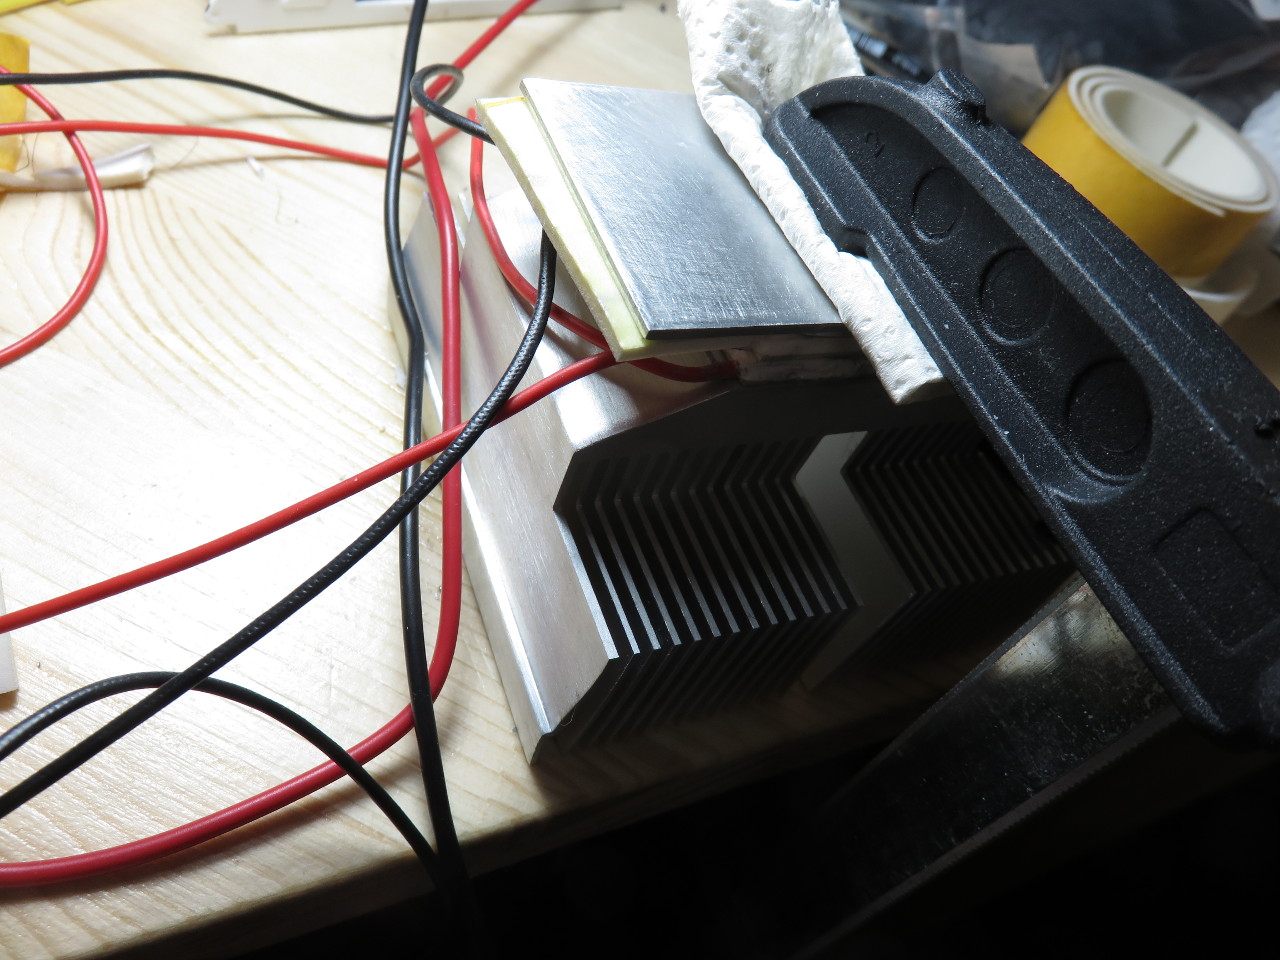
Heres an example of the result of this method using the last piece of scrap aluminum i had laying around:
img_0714-small

Printing multiple times (if you can get the alignment right) or otherwise increasing the toner density improves the results of both methods. Also if there are defects, tiny holes or other you want to paint over them with something before etching. You also can apply some surface treatment like sanding or brushing to the metal before the toner transfer …
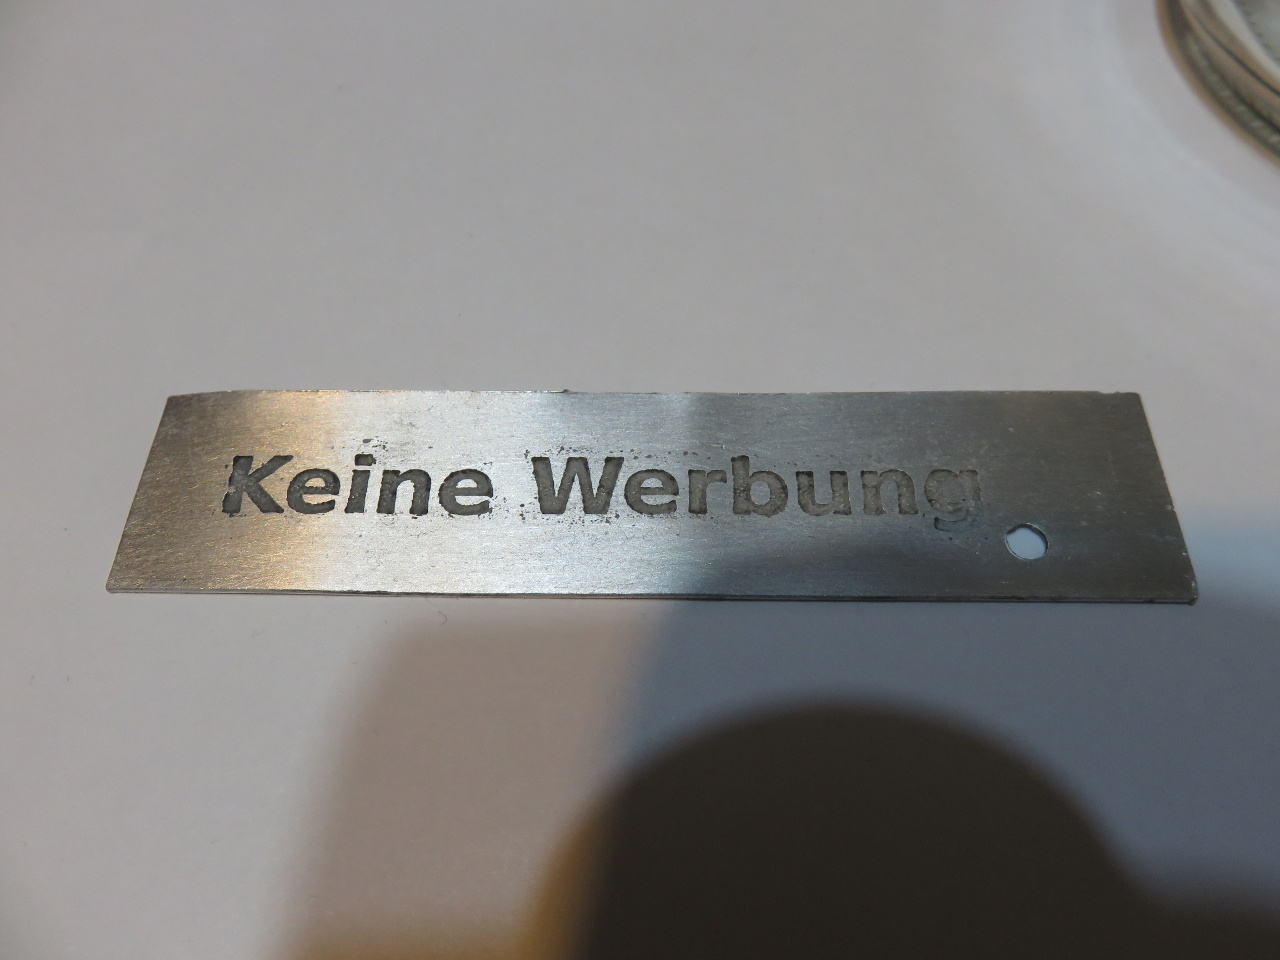
Etching

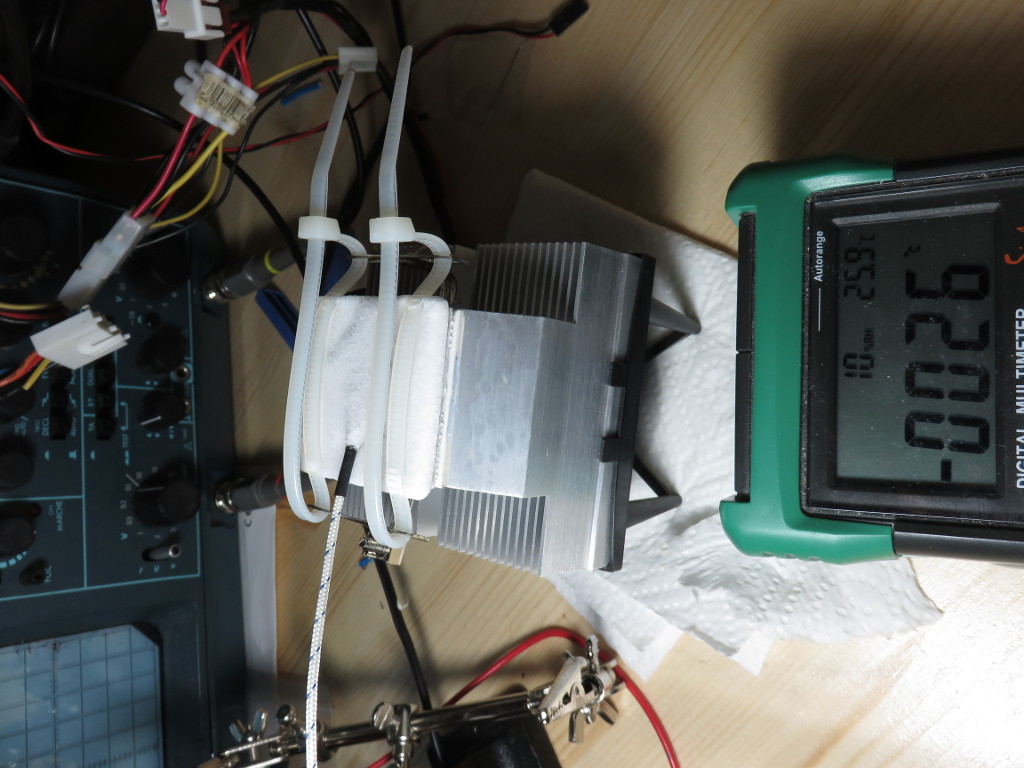
For the aluminum scrap pieces i had i used simple water and table salt as electrolyte, both anode and kathode where aluminum, separated by Plastic clothespins and held together by sticky tape. After several tries i learned that lower currents and voltages seem to work better. that is for the small piece i had something like 1.8V and i think 100mA for 2 hours. (Note, if you attempt to repeat this, you do so at your own risk, Electrolysis of water and table salt produces different things depending on the condition and electrode materials. Other electrolytes may be a better choice even though NaCl seems safe in this setup.)
After etching the toner mask needs to be cleaned off (unless it fell off already which it sometimes did and sometimes it stuck really
well) it can be removed with acetone or with patience also with other random things.

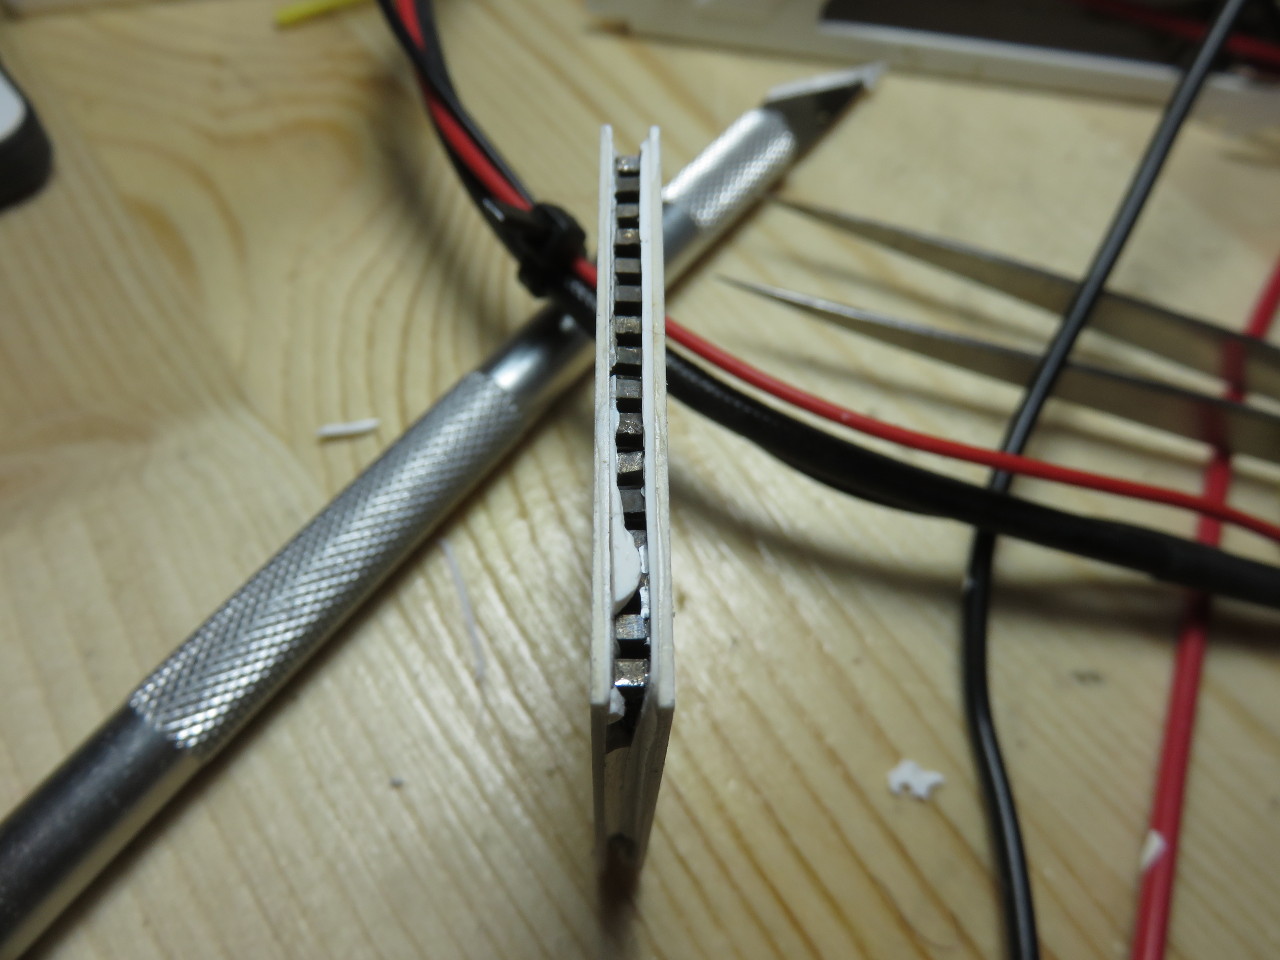
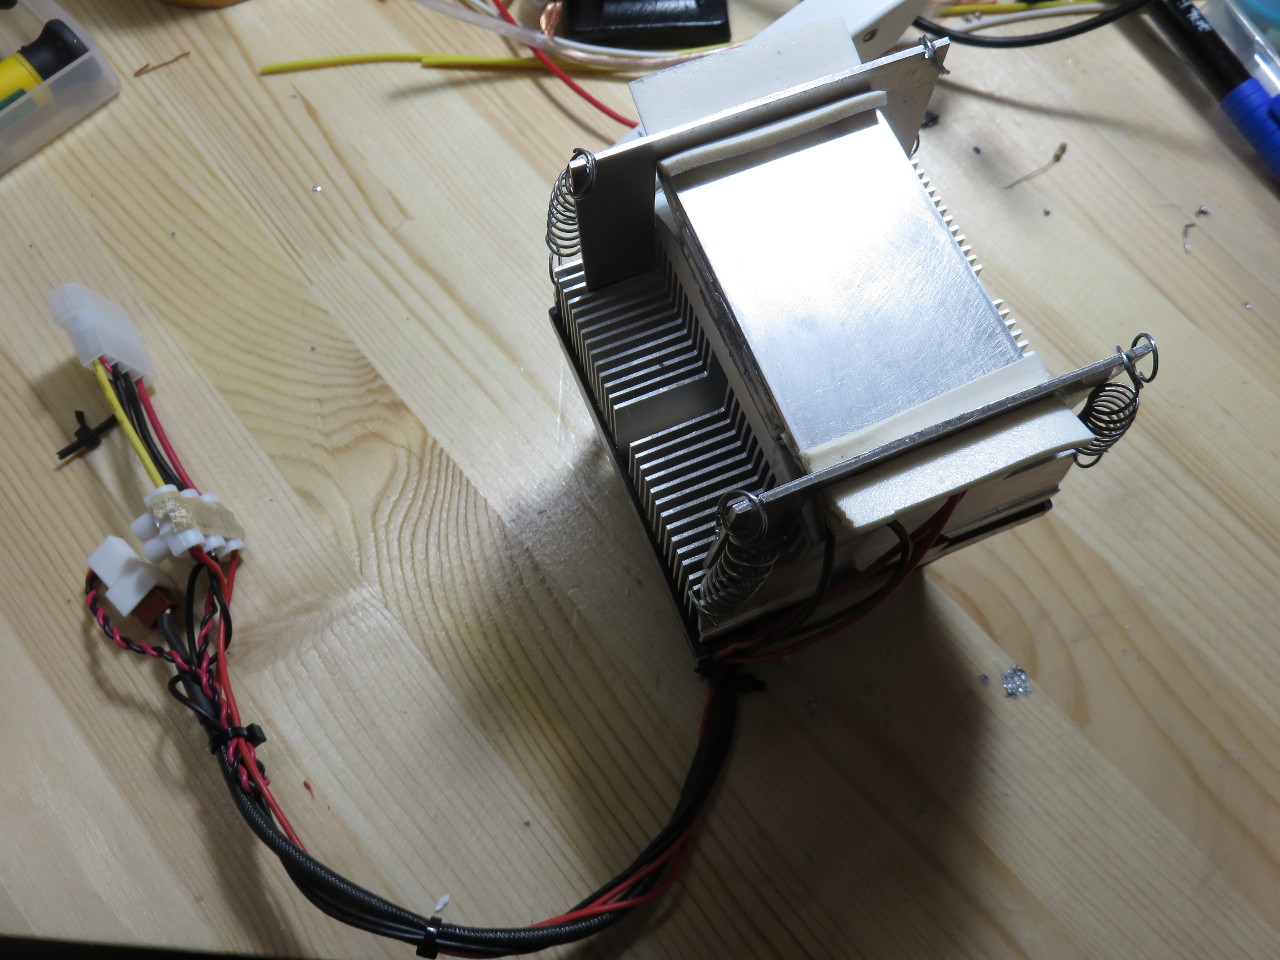
The electrodes with the cut up pieces of a clothespin and tape:
img_4806-small

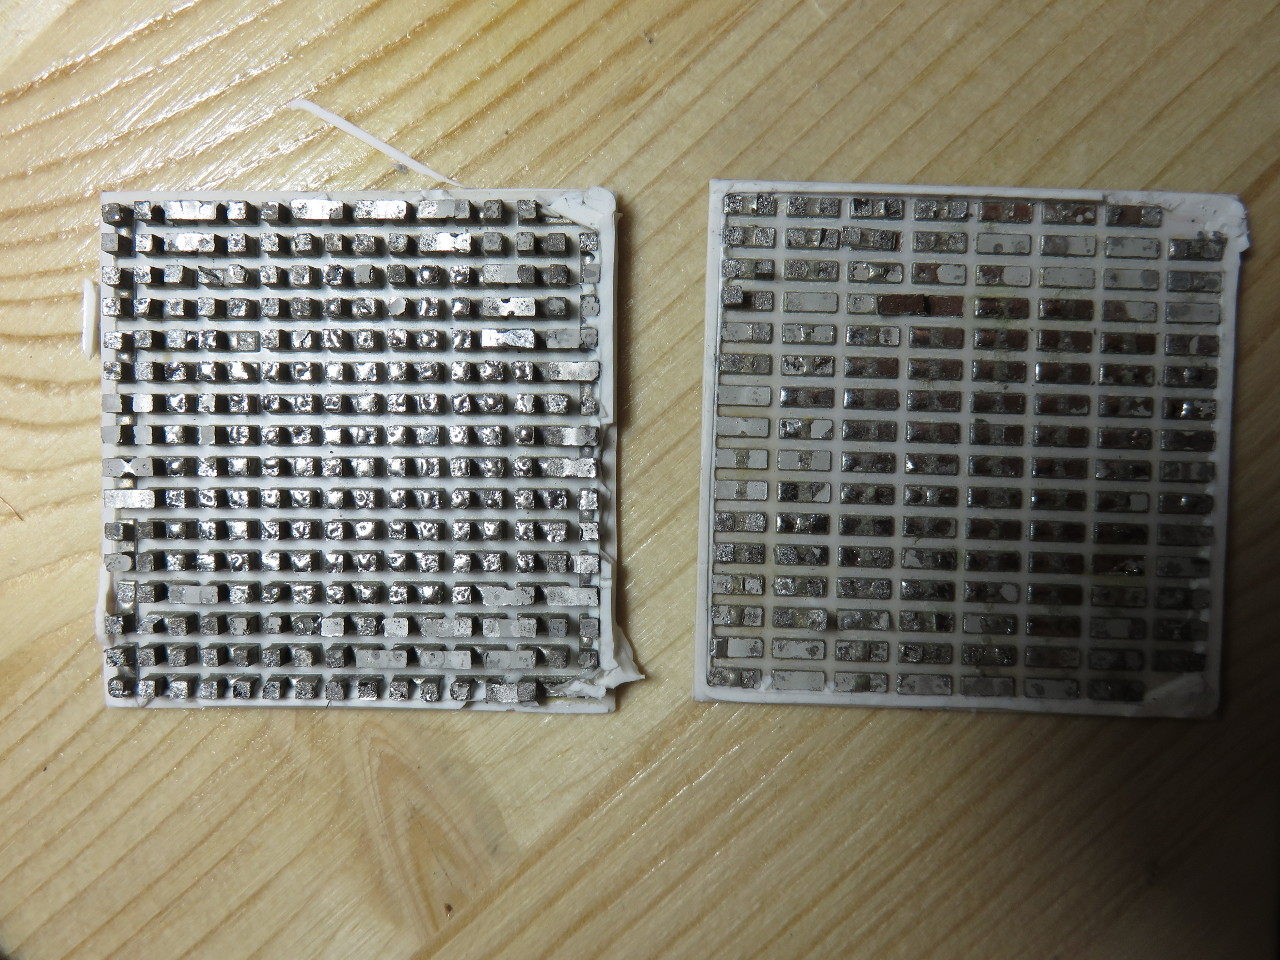
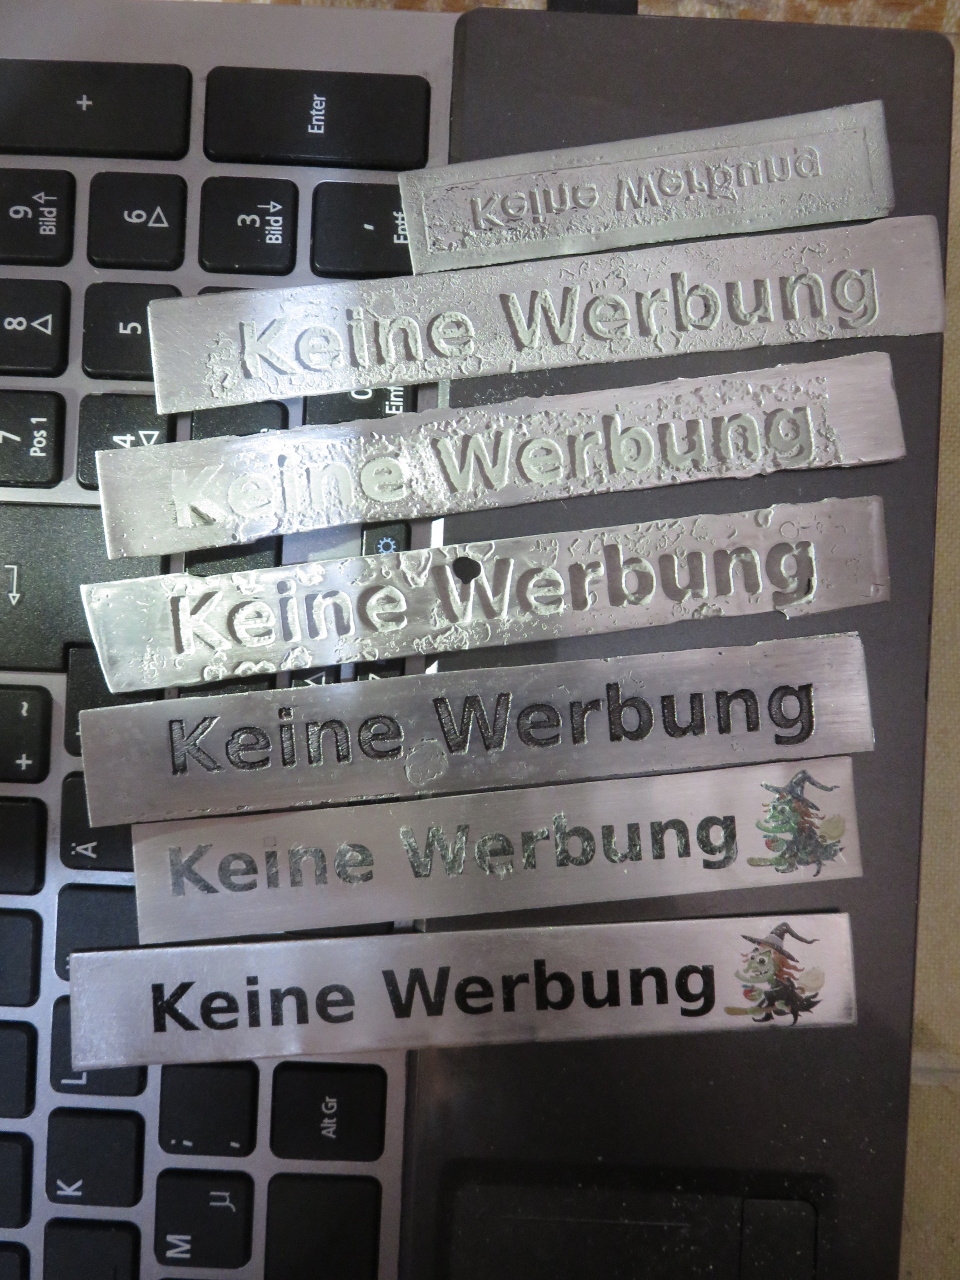
The results of several attempts
img_0732-smallimg_0666-small

Transfer without etching

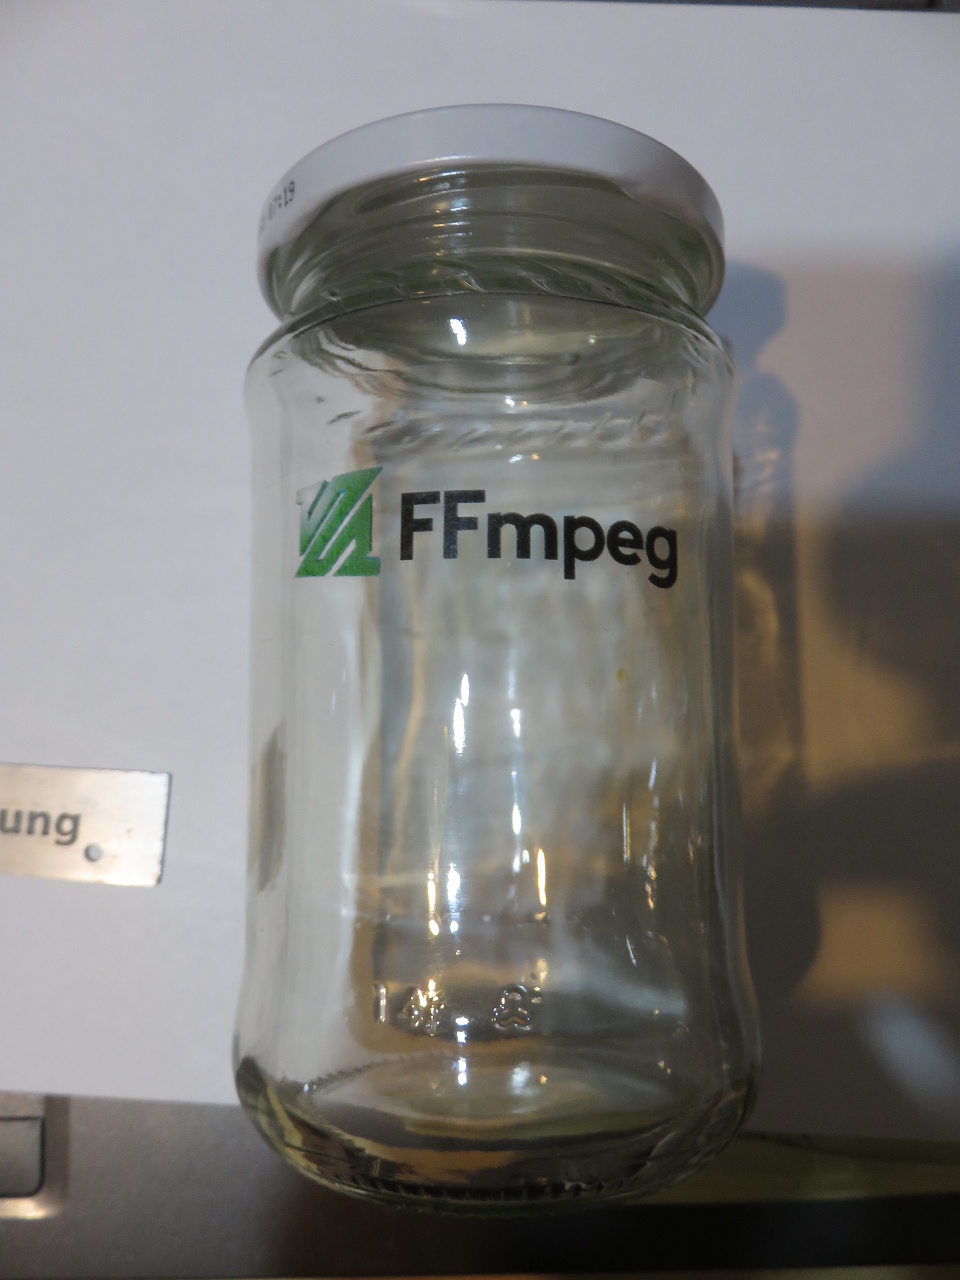
One can of course also skip the etching and keep the “mask” as the final result even with color or even as a addition to a previous etching step. This also works on glass (if you can heat and cool it without it shattering)

The results from my attempts for this:
img_0735-smallimg_0673_small

After this i had no scrap pieces of aluminum left nor really time and the problem i was trying to solve (someone repeatly removing my fathers no advertisement sticker from his mailbox … to collect more free coupons or paper … solved itself as she stopped)

Filed under: FFmpeg,Off Topic — Michael @ 14:37

2016-09-12

Notebook keyboards 2016

A few days ago i replaced my acer notebooks keyboard, several of its keys had become unreliable months ago I first attempted to clean it but that just broke some little plastic part off with no improvement. The process was a bit boing, 24 pages of the (well written) service manual 36 screws some epoxy and 2 hours later my note book was working again with new keyboard.
This notebook is definitely not built to be serviced, having to disassemble it partly from the bottom to get to the top. Some screws screw into plastic, many of them have the plastic cracked after screw removial making reassembly tricky. Some screws screwed into metal inserts, 2 of which broke off without me even touching them, requiring the epoxy to reattach the metal inserts onto the brittle plastic. There are also plastic latches before you disassemble things, the ones of the main door at the bottom are indestructable it seems but the ones deeper inside seem not intended to be reused judging from the smaller number of clicking sounds when reassembling …
My previous acer notebook i once dropped and it still works. It also still has its original keyboard and the hp omnibook i had before i could use until many of the keys on its keyboard had no readable symbols on them anymore. Though today that old hp notebooks plastic parts have also become extreemly brittle but its keyboard could be exchanged by just removing one or 2 screws IIRC.
In the distant past electronics seemed to last forever becoming obsolete long before failing. Now it seems most stuff fails long before becoming obsolete.
img_4802-smallimg_4803-small

Both keyboards after the replacement:
img_0676-small
And most disappointingly no parts where left unused after reassembly nor where any missing. I guess my workspace was too tidy.

Filed under: Hardware — Michael @ 22:10

2016-07-04

voltage tester

DMMs are usefull but for some things they are a bit inconvenient and bulky. So for fun and less so for potential usefulness i bought the 8 in 1 voltage tester depicted below, smaller than a DMM, puts a small decreasing load on the tested circuit allowing things like GFCI testing and so on.
IMG_4760-small
But when testing at 220V AC it produced:
IMG_4764-small
In fact the 380V LED lights up down to 175V.
Opening the thing up without destroying it proofed to be some effort, the inside:
IMG_4765-small
I was already starting to trace things and draw a crude schematic to debug this when i noticed:
IMG_4769-small
A unpopulated component, for a fraction of a second i considered a optional features quickly discarding that in favor of the hypothesis of excellent quality management in this ultra high end (it cost almost 5 euro) tool.
So after a bit of thinking, guessing and testing i wanted to solder a 100k resistor in there but my 10-15 euro variable power soldering iron didnt work anymore. That one was even from a local shop not ebay. Luckily i still had my grandfathers soldering iron:
IMG_4771-small
Which after exchanging the tip worked perfect:
IMG_4772-small
and after that all voltages work fine, including 220v:
IMG_4773-small
PS: Recommendations for a good and cheap variable power soldering iron are welcome! ;)

Filed under: Electronics — Michael @ 03:45

2016-05-12

Mobile phones for seniors

My grandmother has 2 mobile phones, both identical, they have an old style numeric keypad, tiny monochrome display. They are both old and look like they were used a lot, one works. The other sometimes works, there thus was need to obtain a new phone. Both phones she has have been bought by herself many years ago, they were phones intended for seniors and honestly they are just shit in every way IMO even when they were new, they are even hard and awkward to use for someone young.
I thus bought a cheap android phone for her, i was very curious if that would work out, she is 89 years old and AFAIK never used a computer or smart phone before. Going for a cheap phone that fits the requirements was done as this was quite experimental and i was not sure if she would loose the phone in a week or someone would steal it maybe. The phone needed a big battery as recharging had been a problem with her other 2 phones or possibly their batteries have aged too much.
The chosen phone was a cubot note s, 4150mAh 5.5inch IPS display 2/16gb mem, 4core, 3G, dual sim, dual cameras, … for less than 90euro. The 2 things the phone doesnt have is a notification LED and LTE support. Neither appeared important for the intended use.

On the software side, I installed

  • Big Launcher and configured it so everything one needs is on the home screen, like buttons for directly calling family members.
    I also tried Phonotto, necta and other launchers Phonotto seemed not to fully work with android 5.1, occasionally dropping one out of the dialer without ending the phone call, which made it not ok. I chose big launcher as i had to chose one and it seemed mostly ok
  • Missed call reminder, Which allows all kinds of vibration and led flash and screen on/off based notifications (due to missing notification LED on the phone) But even if it had a LED the bright LED flash and vibration should be better
  • Ultimate Caller ID Screen HD, With all extra buttons disabled and the the screen with just simple buttons for accepting a call and hanging up.
  • quick snap, as a simpler camera app but this wasn’t used sofar AFAIK
  • automate, Used for giving spoken low battery alerts at <30% and similar if the phone charging is interrupted before reaching 60%. Some testing though showed that it did not work reliable (it got stuck when there was no internet connection) and thus was not enabled when i gave the phone to my grandmother, we also were unsure about the notification activating in inappropriate situations

The above, i believe was the initial set of apps when i gave the phone to her, the biggest problem was surprisingly switching the phone on (the lockscreen was also entirely disabled), the button is basically invisible under the silicon protector thingy that comes with the phone. Some sticky patch cut into arrow shape stuck onto the phone helped though.
When we called her on the phone for the first time after leaving she did not succeed picking it up, even though she could do it when we where there after some tries. So it seemed a failed experiment, but a few days later and corrected volume settings she made multiple phone calls with it alone :)
Further improvements we did were, that we installed some software to lock the volume settings (cant remember its exact name, but there are multiple that do the job), the volume buttons are next to the power button. Disabling the “telephone answering machine” as it picks up too quick and only adds the problem of dealing with missed calls, which was a problem with her previous phones already.Call Auto Answer & ReadItToMe configured so it automatically picks up calls from family members after 10 seconds. And we also enabled speaker-phone by default. We also considered to install Gravity Screen – On/Off but as she managed to switch the phone on it seemed more a potential way to switch it on unintended.

One thing that kind of annoyed me alot while configuring things is finding apps that arent full of ads. It seems everything for android these days is either spyware, ad-ware, or costs money. I wish the play store would have a way to search for things that are good old free no hooks attached type of ware. But i guess google wouldnt like how they then would have to mark their own apps.

Also for the case of older people with little smart phone experience, a somewhat more integrated UI for android would be nice. Not needing to install a dozen things that might interact badly or that then dont work with the latest android version.
Something that when randomly shaking or pressing buttons on a phone in standby mode would display an arrow pointing to the power on button. Some reliable and unobtrusive low battery notification would be nice too, and that one not just for seniors, the dim red notification leds are kind of easy to miss. Some easy always available help button that can explain the available buttons/options on any screen, …

Filed under: Off Topic — Michael @ 02:00

2016-01-11

Thermoelectric cooler

A while ago searching around on ebay for geeky/nerdy toys i found some Thermoelectric coolers/peltiers for around 2$ with free shipping. So i bought a few of them …
IMG_0474-small

They all worked fine, one had a hole in its silicon sealant though which ive “fixed” with hot glue (first heated the element up to reduce moisture inside then re-sealed it), i dont remember why i didnt use silicon …

I experimented a bit around with 1 and 2 stage TECs on a old heat-sink + fan that was laying around, the best combination interestingly was 2 stages first at 12V 2nd at 5V. though the gain for 2 stages over 1 stage was disappointingly small, IIRC a little over 10°C. Its also interesting to note that my chinese IR thermometer was not able to measure the temperature of the frosted top, it displayed way too low values. Actual real lowest value achieved was measured with a Type K thermocouple, frozen onto the TEC in a drop of water and frosted over for a while (the snowy stuff that forms should provides some extra isolation).
IMG_0377-small
The 2 TECs in above are attached with cable ties, which was very limiting in what could be placed on top

For some reason yesterday i decided to test using the TECs for heating instead of cooling by reversing the input polarity.
That indeed worked and the same device happily boiled drops of water. I didnt think too deep about what the maximum temperature for the TECs was, i didnt expect failure below 180°C, but the top element died at probably around 120-130°C (K type thermocouple in drop of oil on top).
Not entirely believing the apparent facts, i picked another unused separate TEC1-12706 and retried, heating it to 160°C
which seems to have done no harm to it. Though i used the IR thermometer for measuring the 160°C, i should retry this probably with both thermometers but then according to the ebay article page they are max 70°C ;)

Breaking my TEC cooler toy i took it and the failed TEC element apart, Its failure mode was that it showed >10megohm resistance. Cutting its sealant away, it looked like this:
IMG_0460-1280 IMG_0461-1280

And separating it further with a tiny bit of heat and force (probably only heat was needed)
IMG_0463-1280

Also interestingly none of the remaining individual elements tested open, they all had low resistance. I know nothing about TEC failure modes but i wonder if one little part had just cracked from the heat and maybe mechanical stress. They are all in series so one cracking the wrong way should show similar symptoms …

To rebuild the TEC2-toy now ver2, i placed a piece of aluminum on top and tried to attach it with cable ties, but this proofed frustratingly unstable
IMG_0464-1280

My next idea of fixing it with screws, bolts, nuts or such wasnt an option as i lacked parts of sufficient length with non ridiculous diameter. So i cut 2 pieces of the same aluminum stuff and fixed it with 4 springs created out of a single larger spring separated by some foamy stuff for isolation:
IMG_0465-1280 IMG_0468-1280 IMG_0467-1280

In action:
IMG_0470-1280

Also i tested cooling and heating of a glass container with a liquid. (for cooling a drop of water was used as thermal component between glass and aluminum for heating a drop of minnaral oil). Without isolation, the temperature fell to +9.5°C in 1 hour and with some isolation to prevent the warm air from the fan hitting the container, to +2°C in another hour. Iam quite sure sub zero is achievable with a real attempt to prevent coolness loss but i kind of lost patience.
on the hot side i achieved 67°C with the TEC itself being at around 100°C, so if one would risk damaging the unit it might be possible to boil water in a container with it.

Filed under: Electronics,Hardware,Off Topic — Michael @ 05:00

Powered by WordPress